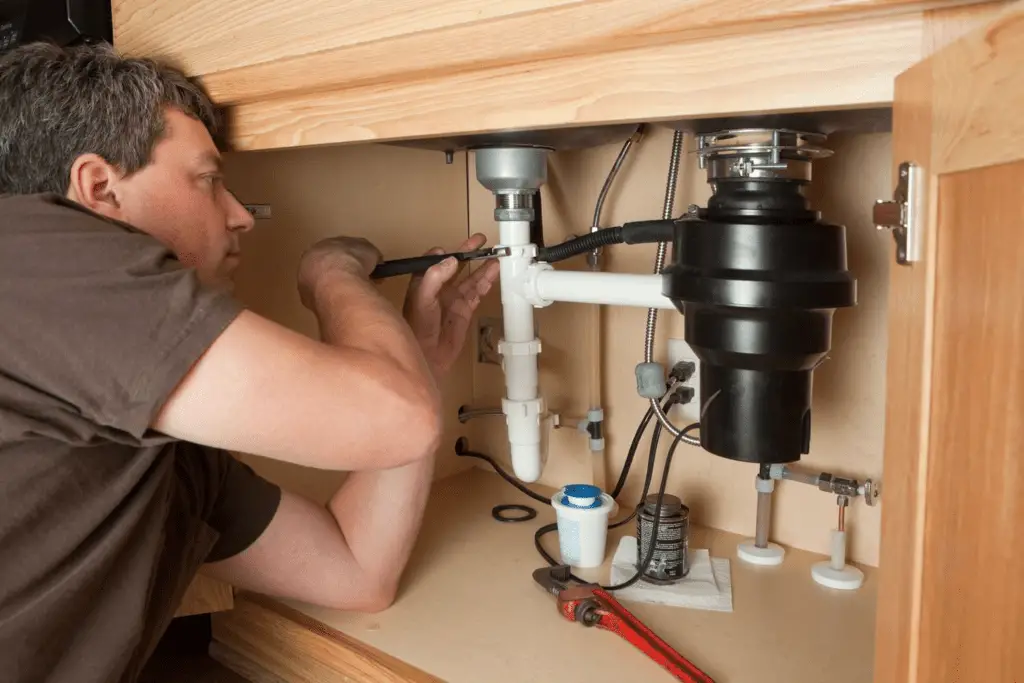
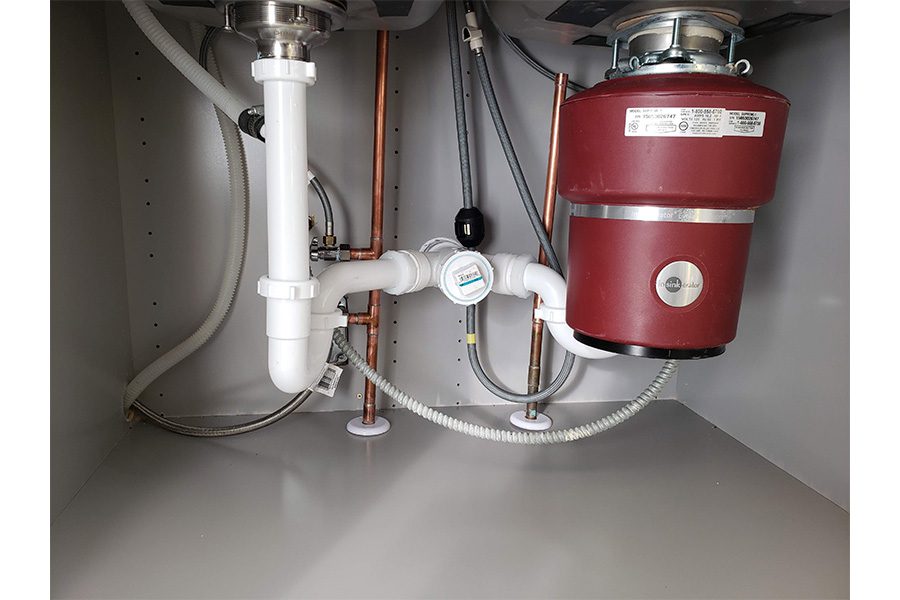
Garbage disposals are a convenient addition to any kitchen, making the process of disposing of food scraps a breeze while reducing the risk of clogged drains.
In this article, we will discuss how to install garbage disposal, We’ll also cover essential maintenance tips, such as how to reset your garbage disposal and troubleshoot that annoying humming noise.
Installing a Garbage Disposal (How to Install Garbage Disposal)
Before you start the installation process, it’s crucial to gather the necessary tools and materials. Here’s what you’ll need:
Materials and Tools Used For Installing a Garbage Disposal:
1. Garbage Disposal Unit: Ensure you choose a disposal unit that matches your kitchen needs and sink configuration. Common horsepower options are 1/3 HP, 1/2 HP, 3/4 HP, and 1 HP.
2. Garbage Disposal Mounting Kit: This kit typically includes a sink flange, gasket, and mounting hardware. Make sure it’s compatible with your disposal unit.
3. PVC Drainpipe and Fittings: You may need to purchase additional pipes and fittings, depending on your existing plumbing configuration.
4. Electric Cable and Wire Connectors: To connect your garbage disposal to an electrical source, you’ll need a flexible cable with a plug and wire connectors.
5. Wrenches: A pipe wrench and an adjustable wrench will come in handy.
6. Screwdriver: A Phillips and flathead screwdriver will be necessary for securing various components.
7. Plumber’s Putty or Sealant: You’ll need this to create a watertight seal around the sink flange.
8. Safety Gear: Gloves and safety glasses are essential for protecting your hands and eyes during the installation.
Now that you’ve gathered your materials and tools, let’s proceed with the installation process:
Step 1: Preparation
Before you begin, ensure that the power to your kitchen’s garbage disposal circuit is turned off. This step is crucial to avoid any electrical accidents during the installation.
Step 2: Remove Old Disposal (if applicable)
If you’re replacing an existing garbage disposal, disconnect it from the electrical source and plumbing. Loosen the mounting ring that holds it in place and carefully lower it down. You’ll need a wrench to accomplish this.
Step 3: Install the Mounting Bracket
Attach the mounting bracket provided in your mounting kit to the bottom of your sink. Follow the manufacturer’s instructions for your specific unit, but it typically involves placing the bracket over the sink’s hole and securing it in place with mounting screws.
Step 4: Attach the Sink Flange
Next, apply a bead of plumber’s putty around the opening of the sink. Position the sink flange over the putty and press it down firmly to create a watertight seal. Wipe off any excess putty that oozes out.
Step 5: Secure the Mounting Ring
From beneath the sink, secure the mounting ring provided in your kit. Tighten it using the screws or a wrench. This ring will hold the sink flange in place.
Step 6: Connect the Disposal Unit
Follow the manufacturer’s instructions to connect the garbage disposal unit to the mounting bracket. Typically, this involves twisting the unit onto the mounting bracket and securing it in place. Make sure it’s stable and properly aligned.
Step 7: Connect the Drain Pipes
Now, you’ll need to connect the discharge tube from the disposal unit to your home’s drain system. Depending on your plumbing setup, you may need to use PVC pipes and fittings to create a secure connection. Use slip-joint nuts and washers to attach the pipes, ensuring a watertight seal.
Step 8: Electrical Connection
Connect the disposal unit to the electrical source. If your disposal unit comes with a plug, simply plug it into a nearby outlet. If not, you may need to hardwire it, which might require the assistance of an electrician.
Step 9: Test Your Installation
Before using your garbage disposal, run a test to check for any leaks or issues. Turn on the water and let it flow into the sink while you operate the disposal. Listen for any unusual noises or vibrations, and inspect the drain system for leaks.
Congratulations, you’ve successfully installed your garbage disposal! With proper care and maintenance, it will serve you well for years to come.
Read Also: The Need for Effective Waste Management Policies
How to Reset a Garbage Disposal

Garbage disposals can occasionally become jammed or overloaded, causing them to shut down. If your disposal is unresponsive, it might need a reset. Here’s how to do it:
1. Turn Off the Power: As a safety measure, always turn off the power to the disposal at the circuit breaker or by unplugging it if it’s connected to an outlet.
2. Locate the Reset Button: Most garbage disposals have a small red or black reset button located on the bottom of the unit. It’s usually recessed, so you might need a long tool like a wooden spoon or an Allen wrench to reach it.
3. Press the Reset Button: Gently push the reset button. You should feel a slight click when it resets.
4. Restore Power: Turn the power back on at the circuit breaker or plug the disposal back into the outlet.
5. Test the Disposal: Run some water and turn on the garbage disposal. It should now be operational. If it’s still unresponsive, you may have a more significant issue, and it’s advisable to consult a professional.
Garbage Disposal Humming
A humming noise coming from your garbage disposal can be frustrating. It usually indicates a jam or obstruction within the disposal. Here’s how to troubleshoot and resolve the issue:
1. Turn Off the Power: As with any work at your disposal, start by turning off the power to the unit at the circuit breaker or by unplugging it.
2. Check for Obstructions: Look into the disposal with a flashlight. If you see any foreign objects or food particles causing the jam, use a pair of tongs or pliers to remove them. Avoid sticking your hand inside the disposal.
3. Use the Wrench: Most garbage disposals come with a special wrench or an Allen wrench for manually rotating the disposal’s blades. Insert the wrench into the bottom of the disposal and turn it clockwise and counterclockwise a few times to dislodge the jam.
4. Press the Reset Button: After removing the obstruction or using the wrench, press the reset button as described in the previous section.
5. Restore Power: Turn the power back on at the circuit breaker or plug the disposal back into the outlet.
6. Test the Disposal: Turn on the disposal and run water. It should no longer emit the humming noise and should work smoothly.
If the humming noise persists even after these steps, or if you’re unable to remove the obstruction, it’s recommended to call a professional plumber or electrician to assess and repair the disposal.
In conclusion, installing a garbage disposal can be a beneficial addition to your kitchen, making cleanup more convenient and efficient. It’s a project that many homeowners can tackle themselves with the right tools and a bit of patience. Additionally, knowing how to reset your garbage disposal and troubleshoot common issues like a humming noise
Read Also: Economic Importance and Uses of Hen Eggs

