Papermaking Process Complete Guide
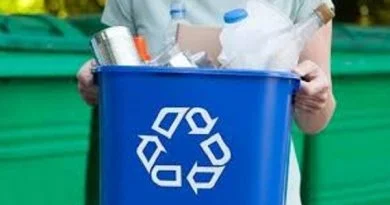
An estimated 90% of all boxboard, newsprint, and paper is collected for recycling in Ontario’s residential sector (Giroux, 2014), but how is it processed? Although the technology has changed, paper has been made the same way through all the centuries people have been making paper from pulp.
First, the base material is mixed with water to create a slurry wherein fibres are suspended in liquid. Then, the slurry is rolled out into large thin sheets, allowing the water to drain and the fibres to be pasted together. Finally, the new paper is left to dry before it is ready to be cut and used.
Read Also : Proper Methods of Waste Management
Different types of materials can be used to make different types and qualities of paper products. While materials for new paper is often pulp created from some woody biomass, scrap paper can be shredded and used as the base material for a new product – recycled paper.

Try it out for yourself!
Materials
Scrap paper, plant and vegetable scraps (e.g., flowers, grass clippings, leaves, carrots, or beets), non-toxic fabric dye, fasteners (staples, tacks or waterproof glue), two wooden frames (approximately 20 cm x 15 cm), nylon screening, kitchen cloths (porous type), blender, sponge, iron, large plastic basin
Methods
Staple nylon screening tightly to one wooden frame to make a paper “mould”. The second frame without the screen is the “deckle”, which will help make the edges of the paper more even.
Remove any plastic or staples from the scrap paper and tear it into small pieces (about 2 cm). Soak it in hot water for half an hour.
Put a handful of the soaked paper into a blender half-full of warm water. Blend at moderate speed until you no longer see pieces of paper. (If you have problems, take out some of the paper.) Add small amounts of plant or vegetable scraps to this mixture (pulp) and blend again. If you want coloured paper, add fabric dye.
Pour the mixture into a large plastic basin half full of warm water.
Place the deckle on top of your screen. With both hands, dip the mould into the basin and scoop up some of the pulp. (The thickness of your paper will depend on the amount of pulp.) Gently shake the mould back and forth to get an even layer of fibres on the screen. When the water has drained through, place the mould to one side and carefully lift off the deckle, leaving the just-formed sheet on the screen.
Lay a clean kitchen cloth on a flat table and lay the screen face down on the cloth. Soak up any extra water from the back of the screen with a sponge. Lift the screen very gently — the paper should remain on the cloth.
Cover the paper quickly with another cloth and iron at a medium dry setting. Once dry, pull gently on either side of the cloth to stretch it this helps loosen the paper from the cloth. Gently peel the paper off.
Compare the strength, colour, and texture of homemade paper to that of the different types of paper used in the classroom. Point out similarities and differences.
Note: Be careful not to pour the leftover pulp down the drain. Collect it in a strainer and throw it out or freeze it in a plastic bag for future use.


